Organizing an art exhibition is a thrilling endeavor that goes beyond simply displaying artwork. It’s an opportunity to create a buzz around your work, sell your work, and document your work in an ideal setting. However, especially for artists taking on the challenge of organizing their own shows, this can be a rather intimidating endeavor marked by doubt and perhaps even making some very common but problematic mistakes. As a result, in this article, we will share the best practices for organizing an art exhibition in a step-by-step guide that not only focuses on sales but also makes a professional and lasting impression.
The art world is full of unwritten rules and nuances that can make or break an exhibition. These rules are in place to ensure the best experience when viewing the art and visiting the exhibition from the perspective of a collector, critic, or art enthusiast in general. When planning an art exhibition, it’s crucial to avoid common pitfalls that the art world may see as red flags, going against those unwritten rules. These missteps can hinder your chances of making a significant impact or leveraging the exhibition as a stepping stone into the art world. We will highlight these mistakes and, more importantly, provide you with insights into how successful and reputable galleries organize their exhibitions. By following these guidelines, you can ensure that your exhibition is both professional and effective, setting the stage for future opportunities and recognition in the art world.
If we are not getting any invitations from galleries and our applications to open calls haven’t been successful yet, it can be a good idea to make something happen for yourself instead of waiting for it or having to pay enormous fees to have our work shown at a vanity gallery. Of course, generating sales is one of our goals during an exhibition. However, it should also be our goal to pursue more than making a profit and to make sure that our exhibition is a step forward for our long-term career goals. Therefore, in the first place, we want to gain exhibiting experience; we want to elevate our credibility as an artist with a professionally curated show; our artworks can be documented in their designated context so other galleries can have an idea of how they look in a gallery space, et cetera. So stay tuned as we discuss the very first step towards a successful art exhibition.
Step 1: The Exhibition Concept
The key to any successful exhibition is having a clear exhibition concept—an overarching story or foundation that ties everything together. So, what is the concept or starting point of your exhibition?
Solo, Duo & Group Exhibitions
First, we need to decide if we will be creating a one-person show, also known as a solo exhibition, a duo show including a second artist, or a group exhibition involving three or more artists. A solo exhibition can be a great option to present a complete series of works and create a real buzz around your work as you, and you alone, are at the center of the exhibition. By doing so, you create an opportunity to show your work as a whole to make a greater impact and to expand on the overarching story of your work and vision.
Even though you need to share the spotlight, including a second artist, a third, or more, in a group exhibition also has its advantages. When organizing the exhibition yourself and having to fund, install, and host the exhibition yourself, it can be very useful to do this with a group of people instead of all by yourself. You can split the costs so you can afford a larger space, you can take turns opening and hosting the exhibition, and you can attract more eyeballs to the exhibition by creating a synergetic collaboration where your contacts get to see the work of the other artists and vice versa.
Exhibition Title & Text
Your exhibition should have a clear and cohesive concept that ties the selected works together. This concept not only helps in the curation process but also provides visitors with a meaningful experience. Define the theme, message, and goals of your exhibition early on, and ensure that every piece on display contributes to this overarching narrative. Make sure to provide a title and short text to document and communicate your exhibition concept.
The art world always mentions the artist’s name and the title of the exhibition when exhibiting solo works. In group exhibitions, the title is mentioned, followed by a recital of the exhibited artists. Make sure to follow this industry-approved standard to make a professional impression.
E.g. 1, “Lucy Bull: Ash Tree” at David Kordansky Gallery
E.g. 2, “Paul Klee: Psychic Improvisation” at David Zwirner
E.g. 3, “Imagine
Ivan Argote, Daniel Arsham, Sophie Calle, Mathilde Denize, Bernard Frize, Hans Hartung, Thilo Heinzmann, Kim Chong-Hak, Lee Bae, MR. Takashi Murakami, Park Seo-Bo, Paola Pivi” at Perrotin
Step 2: Finding the Right Venue
The Type of Venue
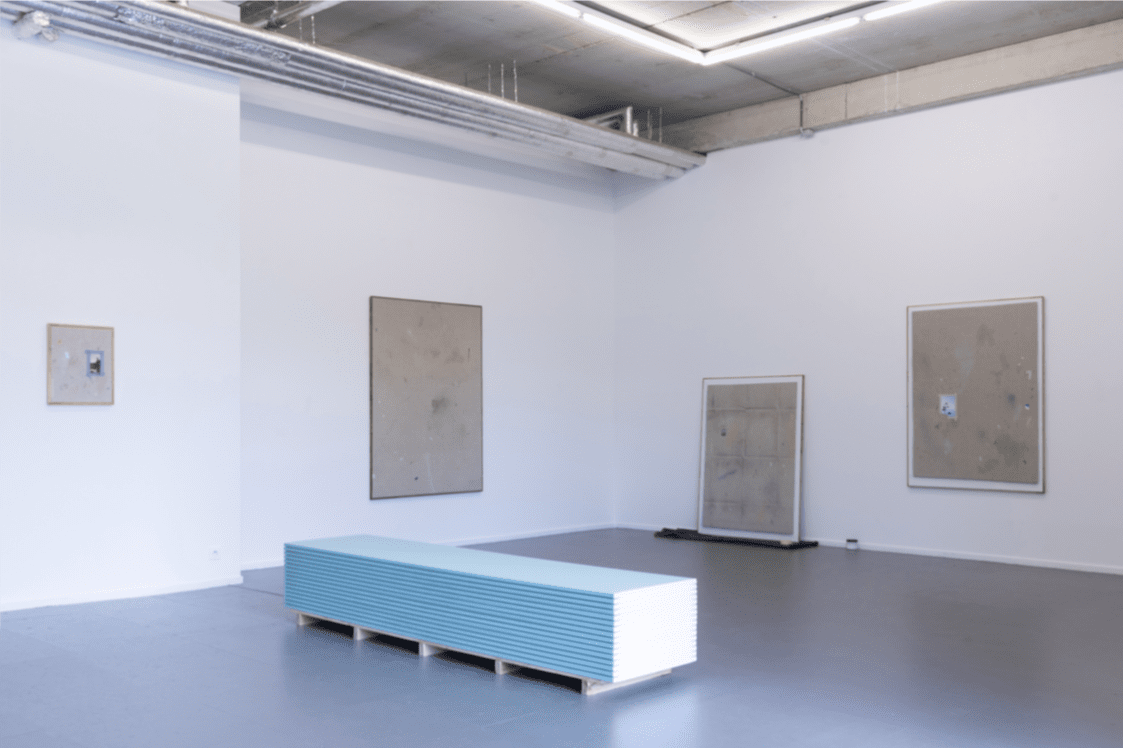
Unfortunately, when it comes to finding the right venue for your (personal) exhibition, your budget will most often be the determining factor. Make sure the exhibition space is large enough if you are planning to organize a group exhibition. Preferably, we want to find an open space with white walls and grey/concrete or wooden floors, similar to the setting of 95% of all art galleries.
Finding and using unconventional locations like warehouses and outdoor spaces can also be an option, but it will make a less professional impression, and galleries won’t be able to identify with those spaces or see how your work would do in a typical gallery space. There is a very good reason why galleries prefer these sterile and white environments; they want to focus on the art and only the art. The context makes a difference, and we want to make sure that we give our work the context it deserves. We need to respect art and the viewing experience.
As a result, allowing your work to be exhibited in tents, sheds, or in the open air when the art is not designed for outdoor display is a major red flag for art galleries—so it is advised to avoid these venues at all times. Instead, we want to look for a space that looks very much like an actual art gallery. Think of exhibiting your work in your very own studio if the budget is tight—and if the studio is large and clean enough—or renting a venue via, for instance, the storefront that is designed to be used as a gallery space. Or perhaps there are some exhibition spaces that you can rent or local entities with whom you can collaborate, think of libraries or city halls.
You need to be aware that the space matters. It is better to rent a high-end space just for a single day instead of a less-suited space for a week. During this exhibition, you can photograph your work as it is meant to be seen and used in an artistic context. If this artistic context looks like a top-notch gallery, people will look at your work and you as a person as a top-notch artist. This is the power of appearances. Be aware of this power and use it to your advantage. Don’t use it to “fool” people into believing you are more established as an artist than you actually are, but show them what standards you pursue for your art and what your standards are as an artist.
The Location
When it comes to the location of your venue, once more, the budget is a crucial factor. It is a plus if your venue is located in a vibrant city center to meet new people and attract new clients. However, these venues are, of course, more expensive, with a very high price per square foot. If you organize your exhibition at home or in a more remote environment, the cost will be lower, you might have more space, but the overall prestige and amount of people you reach will be lower. Ideally, we want a large, open, and high-end space in a city center, but don’t spend fortunes on your venue if you cannot afford it.

Step 3: Duration & Timing
Selecting the right duration and timing for your exhibition is crucial. Consider the availability of your audience and other events happening around the same time. Typically, exhibitions run for a few weeks to a month, allowing enough time for word-of-mouth promotion and repeat visits. However, if your budget does not allow you to have a nice space for a long period of time, you can organize your exhibition for just one day or for a weekend. During this short exhibition, we can welcome all our visitors simultaneously, resulting in a nicely filled exhibition space, which is important for the perception of an exhibition being successful.
Even more, during this short exhibition and prior to opening your doors, you can take numerous installation views of the exhibition and share in the days, weeks, or even months after the show to stretch that “buzz” and spotlight on your work beyond the closing day by sharing it on social media and with your mailing list. By doing so, we can get the most out of our budget.
Avoid scheduling during major holidays or local events that might draw attention away from your show. Additionally, you could organize your exhibition during a specific art event where your audience—galleries and collectors—are present. Think of renting a space in Venice during the Venice Biennale or, more realistically, during an art fair or art weekend in a medium-sized art city.
Step 4: Selected Works
Kill Your Darlings
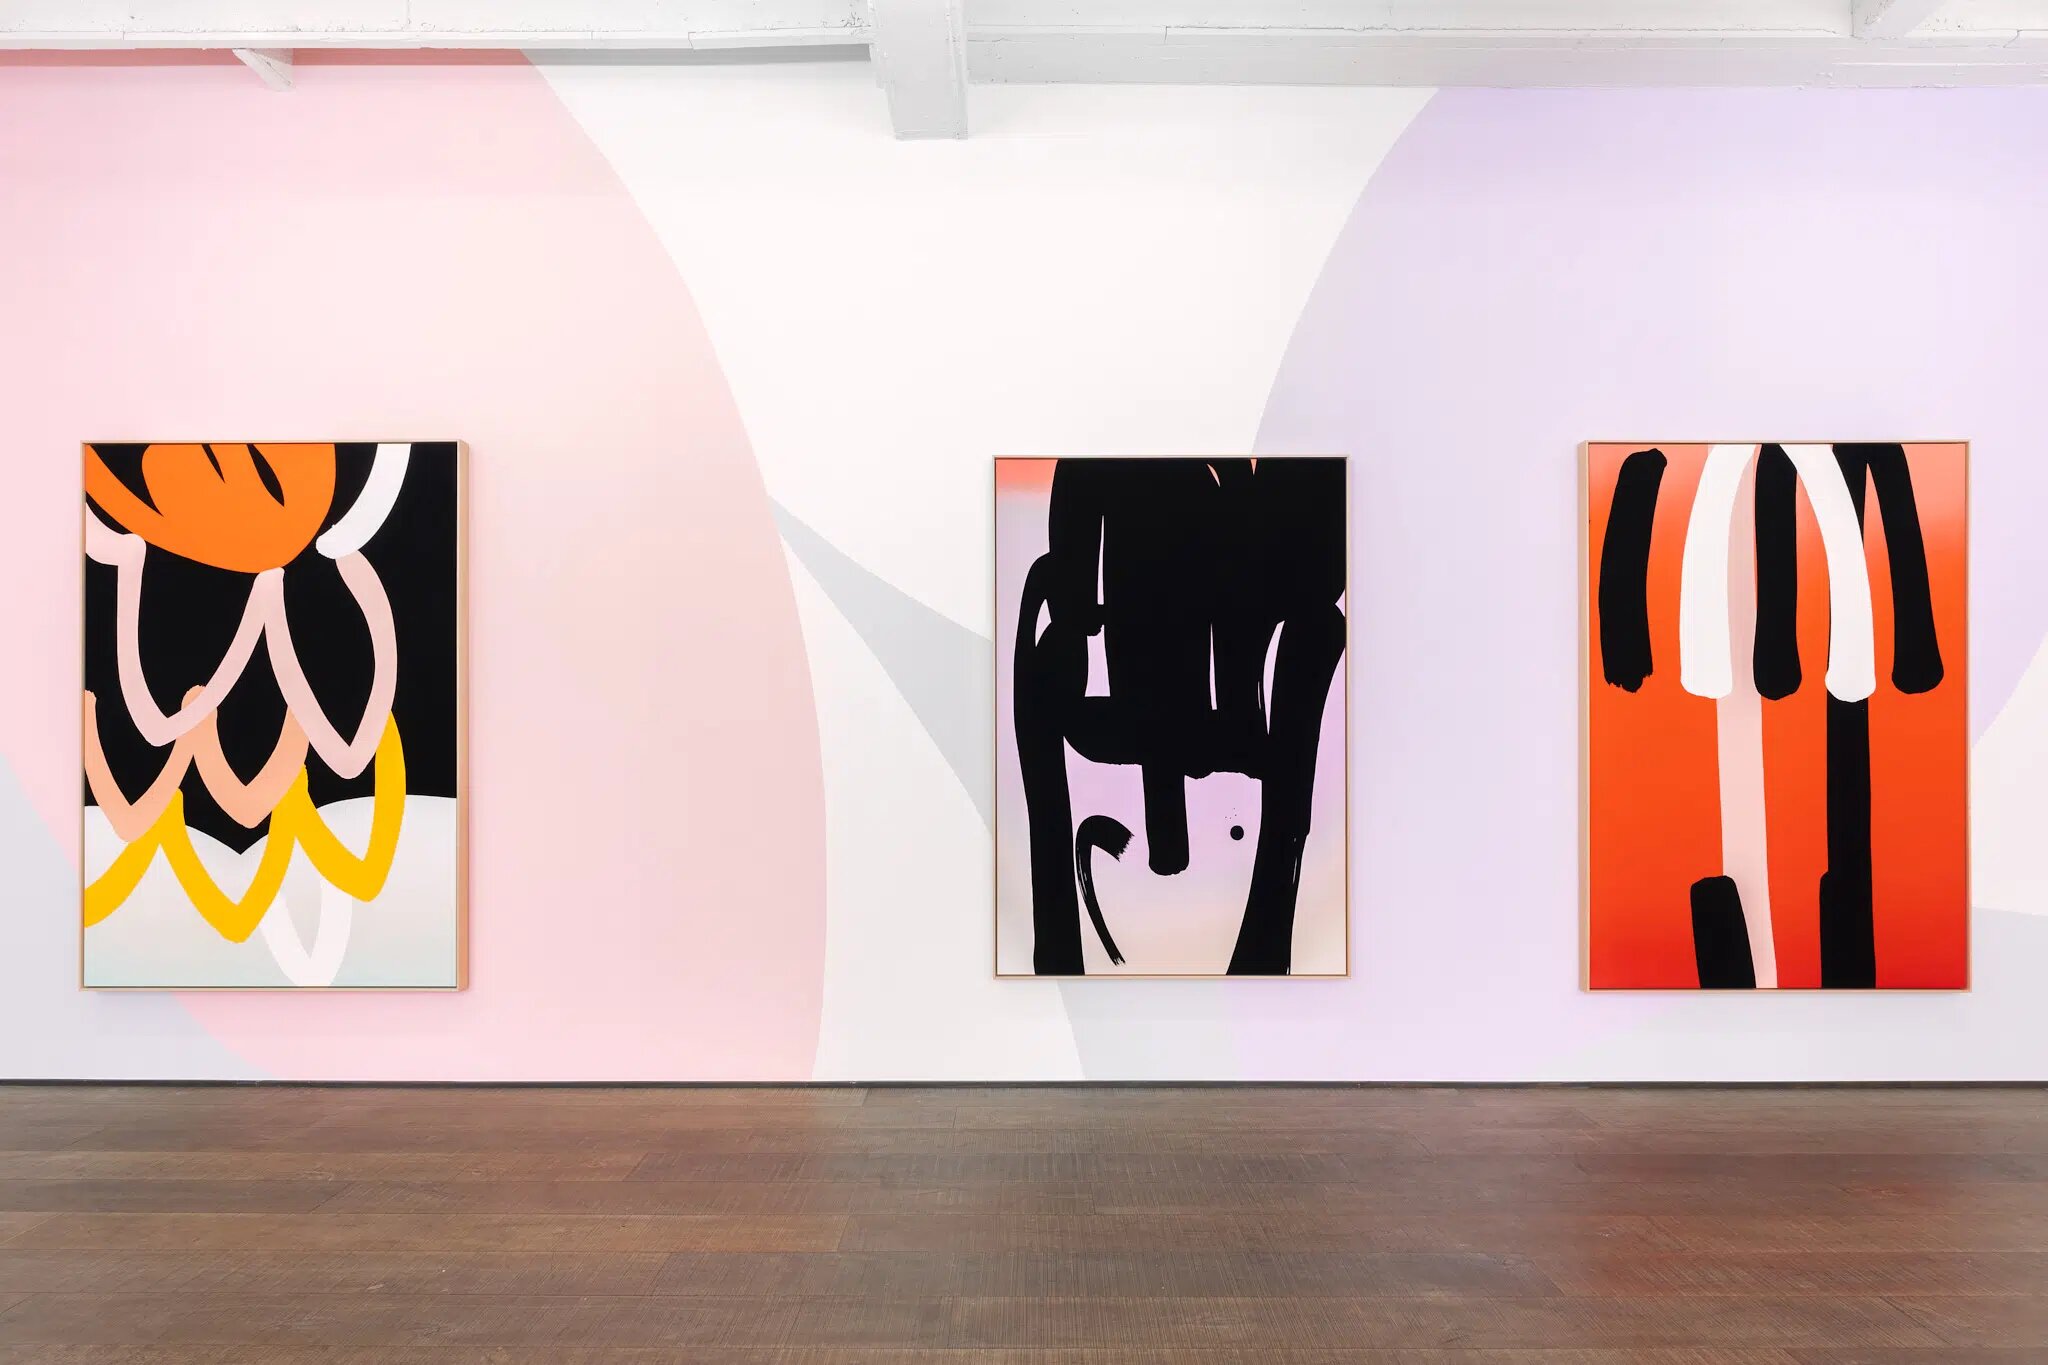
Now, it is time to select the works that will be on display. Here, there are two common mistakes. First and foremost, selecting too much work. You really need to kill your darlings and only show your very best work in the show. You can always have some works in the backroom to show in private—this makes you visitors feel special, and it ensures the highest quality in the exhibition space itself. If not, your great works will get lost between the more mediocre ones. Less is often more; a well-curated selection of pieces can make a stronger impact than a crowded gallery.
Curate Carefully
Another detrimental mistake is showing a completely random selection of works. Carefully curate the works to be exhibited, ensuring they align with your exhibition concept. When people see too many different things, we no longer know what we have seen, which won’t leave an impression. This is also how exhibitions work with actual empirical evidence. A good exhibition—an exhibition that generates sales—presents a series of works with a strong unity in which the different works start to support each other, resulting in a convincing ensemble and viewing experience.
If you have a look at the solo exhibitions at all the renowned art galleries, you’ll notice that the artist always presents a coherent selection of works that most often are part of a single series designed for this exhibition and the exhibition concept. So you must try to do this as well—not only to have a better show and more sales but also to show that you understand this crucial aspect within your oeuvre development. You must show that you know what you are doing and that you are able to deliver such a convincing and coherent body of work.

Step 5: The Presentation
Less Is More
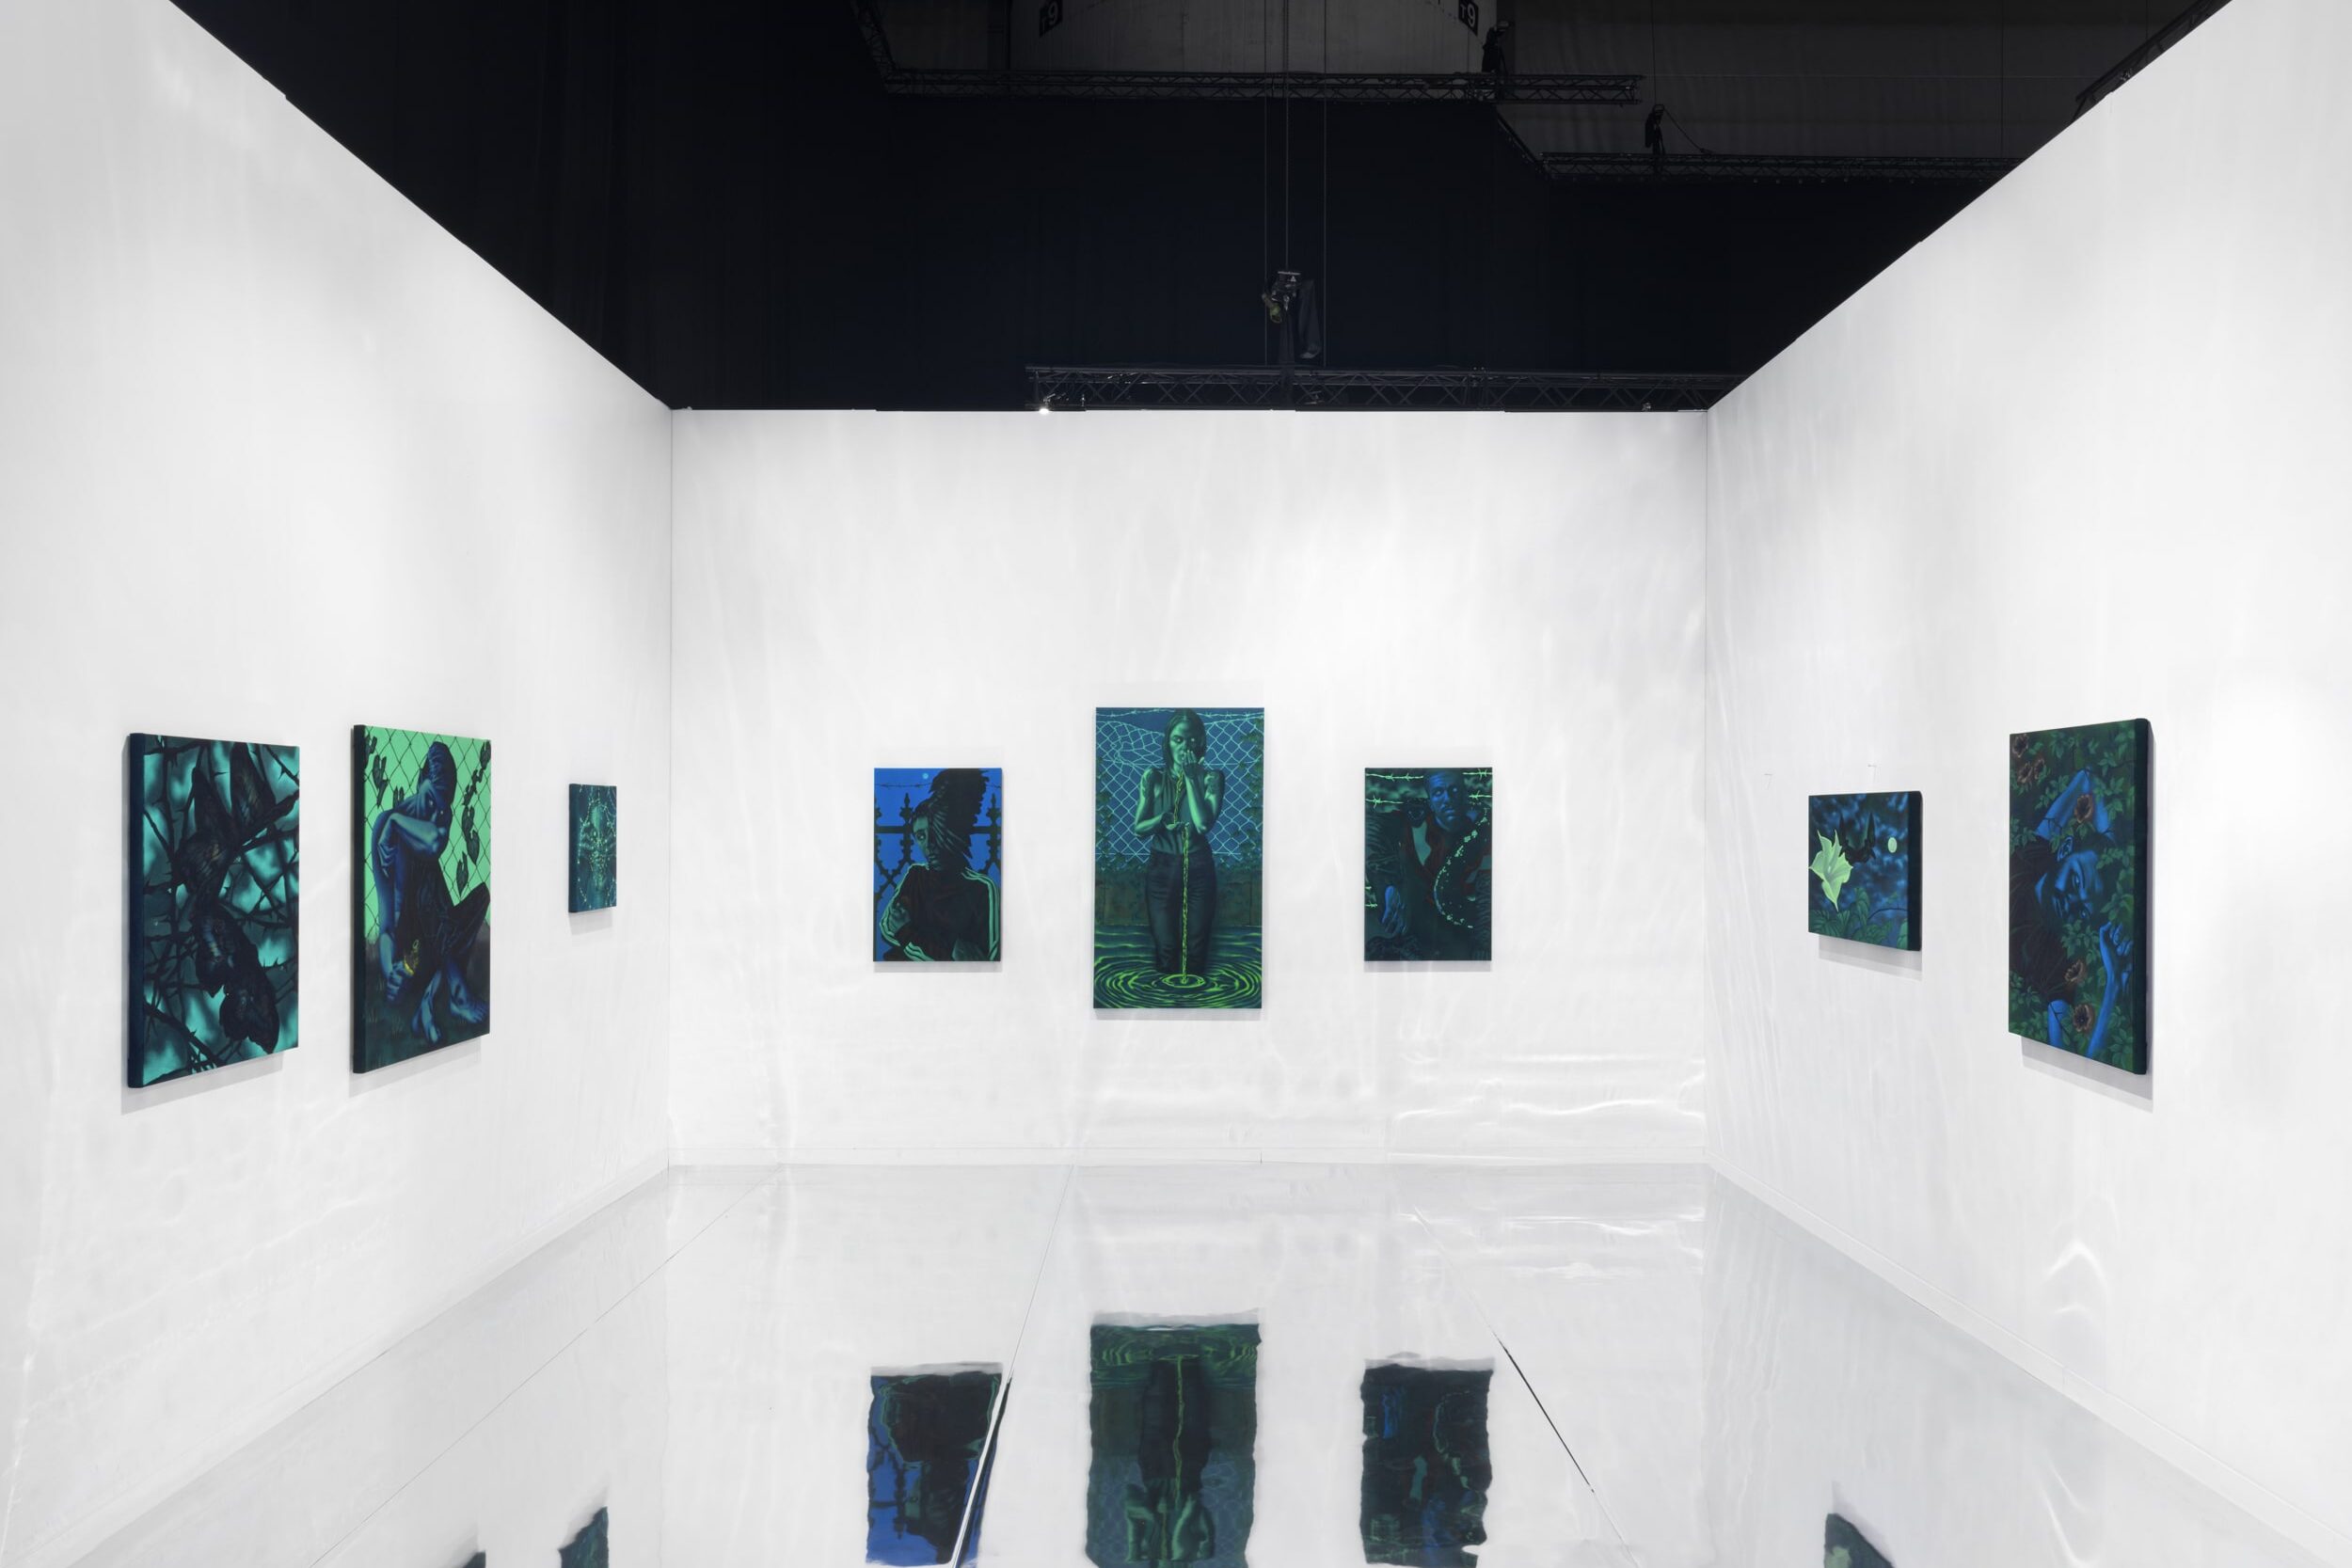
When it comes to the presentation and hanging of the works, the number one mistake is wanting to show too much. Yes, you are excited to show your work, but when you show too much, your visitors are blinded by the abundance of visual information. For an ideal art experience, the work needs to be able to breathe—and this is determined by both the artwork and the space. As a result, one must consider the flow of the exhibition and how viewers will move through the space. Each piece should have enough room to be appreciated individually and as part of the whole.
Of course, during an exhibition, we want to sell as much as possible. However, hanging more work does not equal selling more on work. In fact, empirical evidence has often proven the opposite is true. By opting for a scarce and professional hanging similar to the ones in the top-notch galleries, not only will we come across as more professional and will the viewing experience of the art be better, but you also have a sense of increased value per artwork. A matter of offer and demand. The greater the offer, the lower the price. So by presenting a limited offer, the perception of the value of the art goes up.
Studies have also shown that one of the main reasons why buyers do not proceed to purchase a work of art is because there is too much choice. Oversupply leads to indecision. Even more, when a few works have been sold from your limited selection of works on display, you create a sense of urgency, which will result in a higher conversion rate once more. So there is no point trying to show twenty works in a small exhibition—you’ll never be able to sell twenty works anyway, and it will make you look unprofessional. So instead of trying to showcase twenty works and, in the end, just sell two, showcase six works and sell three, or perhaps more. You’ll have a better viewing experience, great exhibition views, and elevated credibility, which can result in more sales in the long run by convincing a gallery, for instance.
What should we do with the other works? You can simply add them to the catalog with available works and show them in private on request. So don’t stress too much about not showing a particular piece. If they like it in the catalog and are really interested, you will still be able to sell it if the right person walks in for that piece. So don’t think about the sales; first, think about the quality of the exhibition, and the sales will follow. Don’t be too focused on short-term income, and don’t be overly commercial.
Below, we have a comparison of an art fair exhibition done right—by David Zwirner at Frieze—and on the left by the independent artist Jeff Murray at the Other Art Fair. It is clear to say that the David Zwirner booth has a much better viewing experience for the visitor, and the perception of value is a lot greater. David Zwirner focuses on their artistic goals first, unapologetically sticking to their high-end standards—even though the big galleries are the ones that are blamed for not caring about the art and being overly commercial, whereas, in reality, this is not the case.


Other Common Mistakes
Try to install and present your work as they install exhibitions in the top galleries. This means you never hang works on cords on the wall—you must always hang them directly on the wall, for instance, by using two nails or screws perfectly level to hang the works. Never exhibit paintings on an easel or on the floor. Place sculptures on a pedestal—a nice white box can be sufficient. Don’t put artwork labels on the art or on the wall. This is not done in art galleries and in the primary art market in general and is only useful in an educational museum context. Never put prices on the wall, either.
Of course, to conclude, the details matter. Make sure everything is hanging level. Try to have an ideal viewing height—most often, people hang their works a bit too high. Make sure to have the works hanging on a line height either at the top, bottom, or middle—or go for a more experimental approach, as we’ll discuss next.
Experimental & Playful
Even though there are many rules in place to ensure an ideal viewing experience, artists are still allowed—and even encouraged—to be experimental, creative, and playful when installing their shows. However, you must be aware that this is often a hit-or-miss scenario. It can either work out great and provide real added value to the show and exhibited works, or it can ruin the entire exhibition when it does not come across as professional. So be aware that it is always a risk, that is often easier said done done, and that it requires a very good understanding and years of experience to understand what works and what doesn’t.
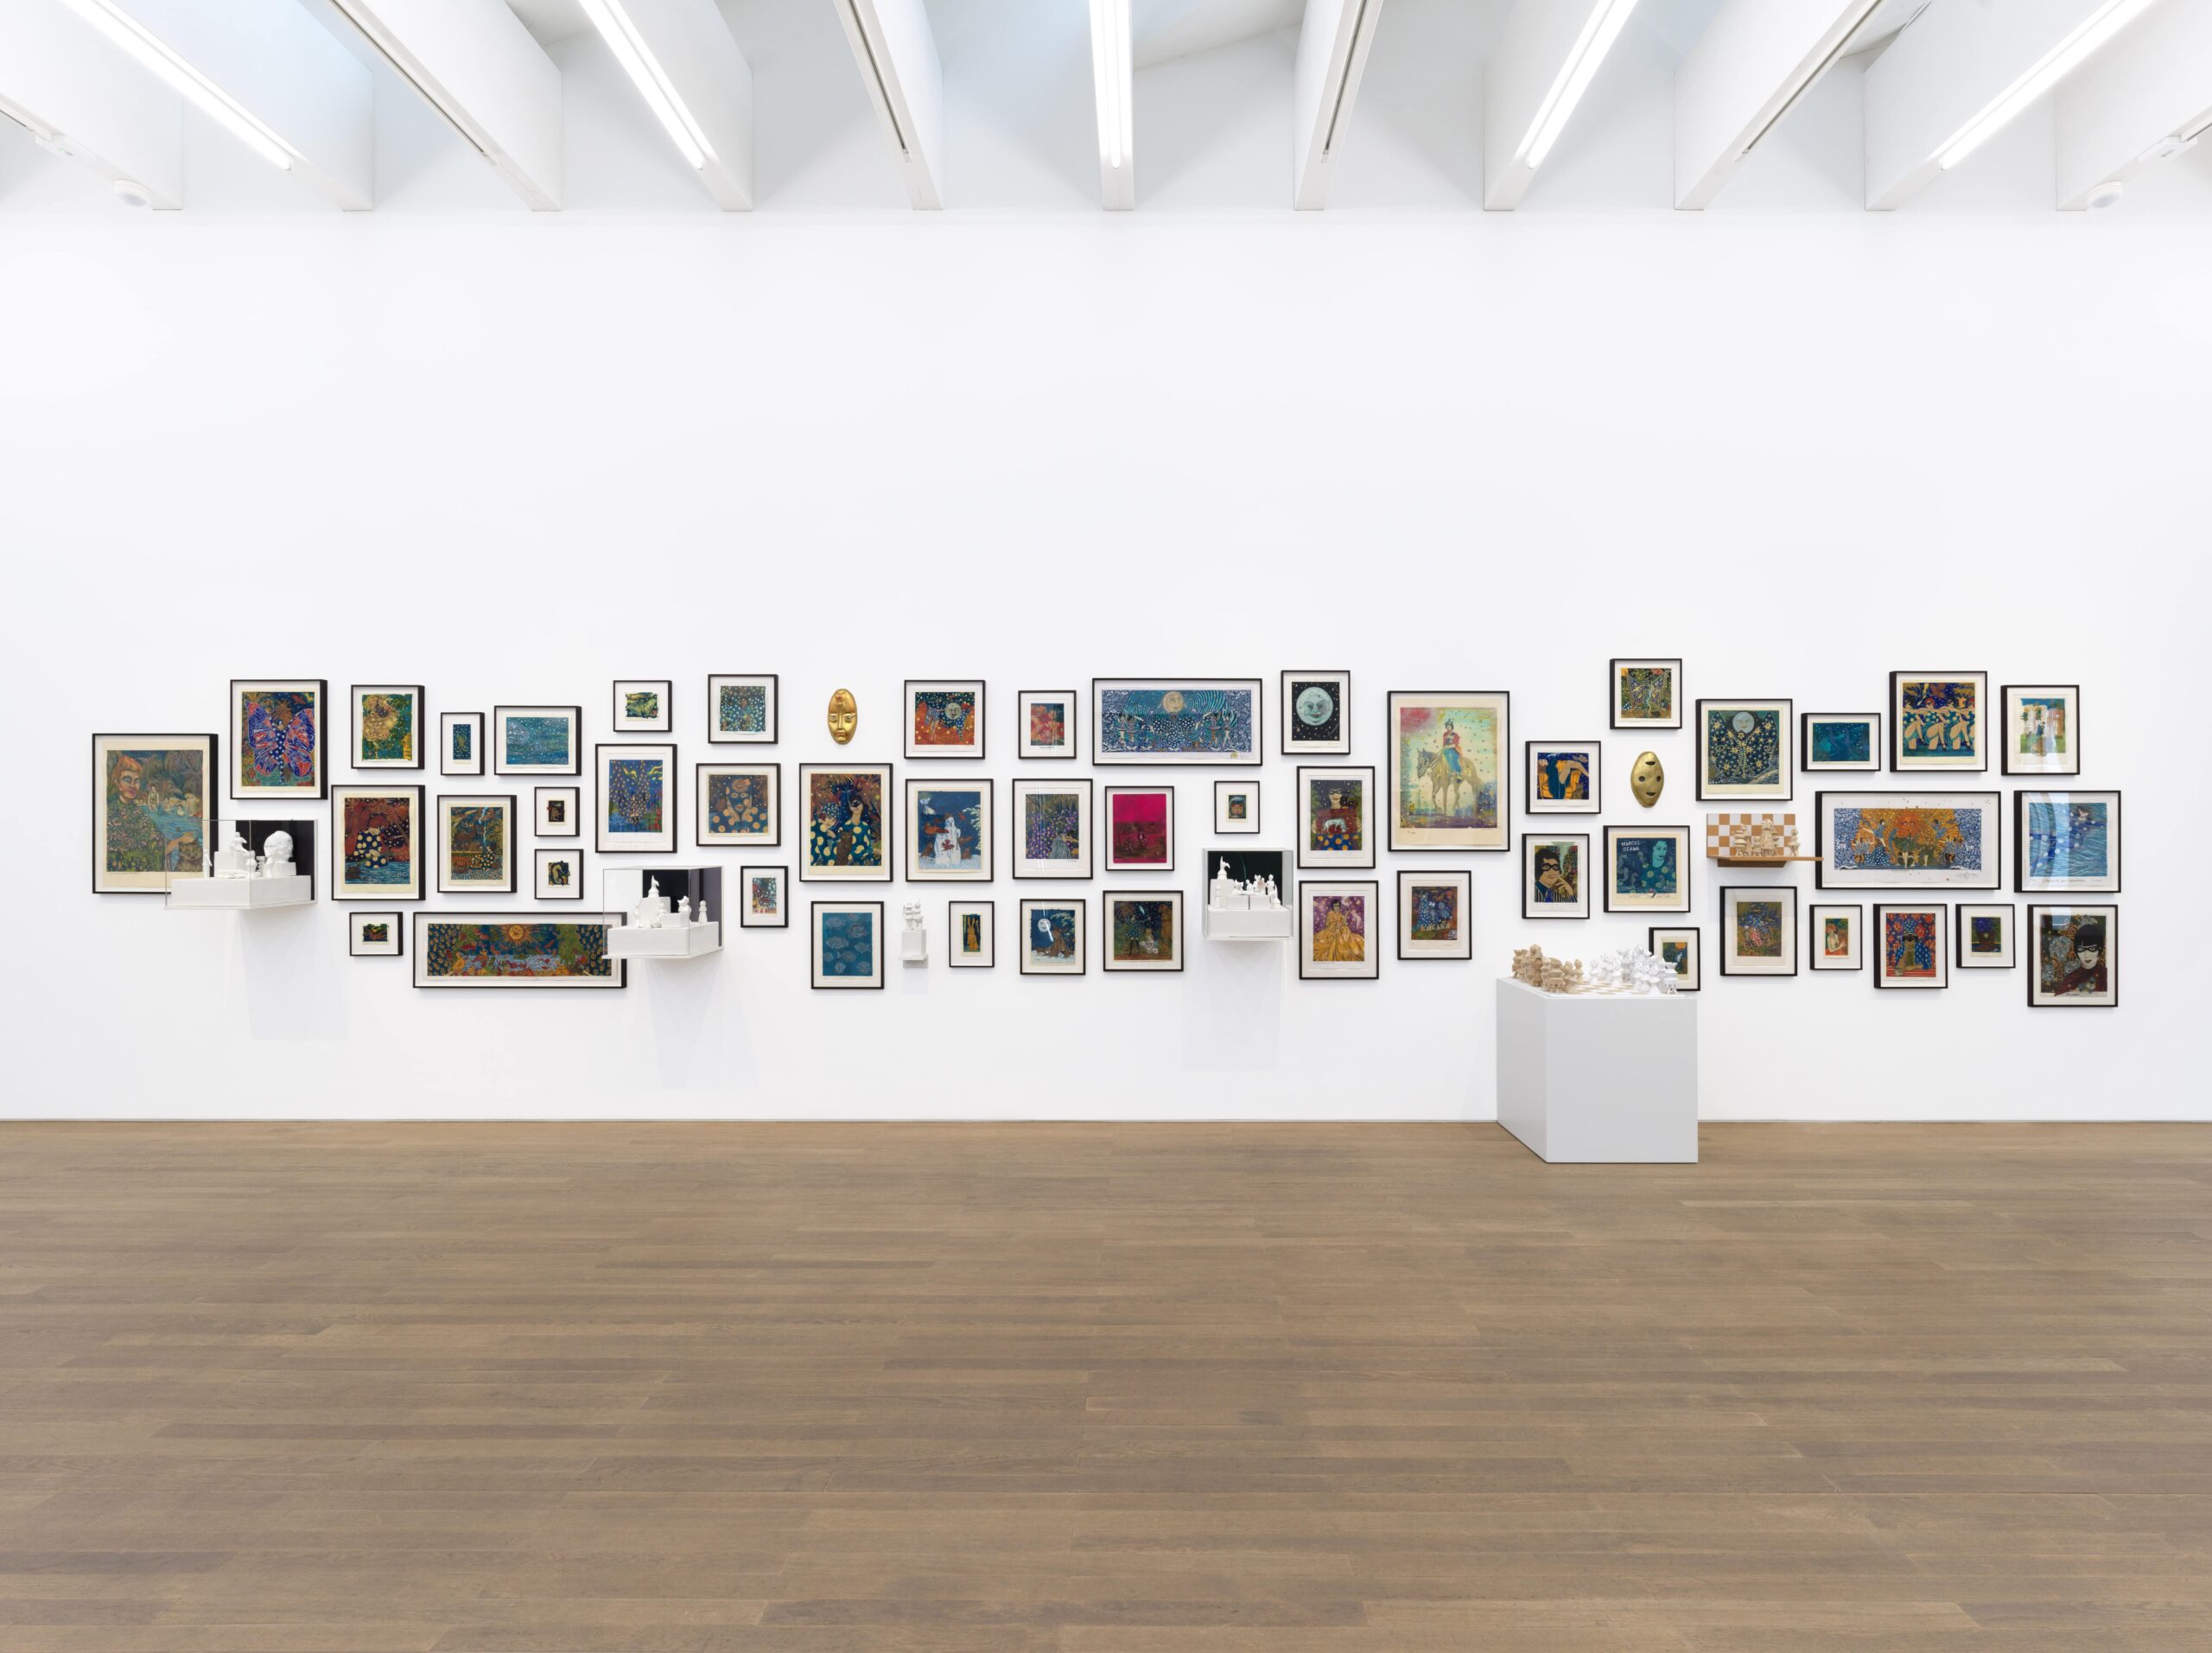
Here is a small selection of some good examples: Ritsart Gobyn’s illusionist paintings that are being placed in a space that is deceivingly unfinished, Cornelia Baltes painting the walls in the same colors and shapes as her tableaus, Marcel Dzama’s playful gallery wall filled with small pieces reminiscent to the salons of the 19th century, Amy Bravo covering the floor to create a new atmosphere in the gallery space, David Weishaar putting a mirrored layer on the floor as if you are walking on water which comes back in the exhibited paintings, or Olga Balema’s experimental hanging of paintings high and low in the gallery space.

Step 6: Documents & Print Work
Next, we need to prepare some very specific and expected documents to promote the exhibition before the show and communicate information to provide more context during the show. Here is the short list of must-have documents and print work you should prepare.
Poster

To promote and communicate your exhibition, it is advised to have an exhibition poster to share online—think of social media to reach your online audience, but also to your contacts via email marketing. Make sure the design is in line with the aesthetic identity of the art world, opting for a minimal visual language, most often using a simple black font such as Helvetica Neue or Times New Roman on a white background or white text on the poster image. You can also include an image of an artwork. Don’t make the design too complicated. Be efficient and professional. Feel free to have a look at other exhibition posters from renowned art galleries for more inspiration. The distribution of the poster can occur solely online. Printing them and hanging them in public is also an option, but the time and costs will always be greater than the rewards.
Flyer/Invitation

What you can share in print is a flyer or a printed invitation. Once more, go for a minimal design and professional design that is in line with the art world. A5 or even A6 is an ideal size. You can place an artwork in full on one side of the flyer, and the exhibition information—such as title, artist, date, opening day, opening hours, location, et cetera—on the other side. Use the flyer in your email marketing campaign, and you can also opt to send some by mail to invite your most valuable contacts personally.
Press Release

A document that is both a must-have before and during the exhibition is a press release. A press release is a text document consisting of all the information about the exhibition—title, artist, date, and location—a curatorial text explaining the exhibition concept, the artist’s work, and possibly some individual works or series to provide more context and information, a biographic text about the artist, an about text about the gallery (if applicable), and contact details for more information. This document can be used to promote exhibition, to send out to the press, and should be available during the exhibition so visitor can take a press release in their hands, have a read, and even take it home with them.
Catalog with Exhibited/Available Works

Next, we want to have a catalog with available works in the exhibition space, where visitors can consult the titles, metadata, and prices of your works. You can also include the works that are not on display at the end of the catalog. Additionally, the catalog most often provides additional information about the artist, such as a professional artist resume and a short and concise artist biography. In this case, you can use the exact same catalog as our Catalog with Available Works Template. The only adjustment I would advise you to make is to mention the exhibition title on the cover and the exhibition concept or press release on the first.
Check List with Exhibited/Available Works

Another option is to use a checklist instead of a catalog. A checklist is a single page that includes all the exhibited or available works, including their metadata and prices (if applicable). As with the press release, visitors can take a checklist by hand and even take it home with them.
Mailing List
Another great document to have in the exhibition space is an empty document where visitors can write down their contact details—in particular, name and email address, to stay in touch for future exhibitions. By doing so, with every single exhibition, your contact list can grow.
Step 7: Invitations & Promotions
When one is too caught up in all the preparations for the show, one can almost forget to promote the exhibition and send out the invitations. Today, the best and most efficient way to promote your show is simply via email marketing and social media—Instagram in particular. Let’s start with the latter first.
Make sure to have your poster and flyer ready approximately four weeks before the opening day. Announce your upcoming exhibition by posting the poster. Throughout these four weeks, you can share teasers in your story or details of some works that will be in the show. With every post and story, you remind your followers of the upcoming show, sharing the exhibition title and opening date.
In the final week before the opening, you can send out personal invitations via direct message, possibly including your flyer/invitation digitally. During this week, make sure to post a story or post every single day before the opening with a clear call to action: visit the opening. You can try to make it even more appealing by mentioning drinks will be provided and a possible afterparty—this will definitely encourage your friends to support you.
First, make sure to manage your contacts professionally via a central contact list, separating them into different groups: collectors, galleries, critics and press, artist colleagues, and friends and family. This can, in fact, also be useful for your Instagram marketing and networking strategy, ensuring that you personally invite collectors via direct message, for instance.
Now, it is time to invite these different groups of people by mail. I would advise you not to create an email campaign using newsletter software such as Mailchimp or a newsletter service that is provided by your website builder because they feel impersonal and corporate, might arrive in the SPAM folder, and are often ignored because we already receive so many newsletter campaigns. A direct email with simple text and an attachment is much more personal and efficient. Send them out to each individual group from your central contact list by inserting your contacts as undisclosed recipients, personalizing the content of the email depending on the contact group.

For instance, with collectors, you can share a VIP preview of the show, including prices and some exhibition views (if applicable). For other galleries, you can write them to inform and invite them. For your press contacts, you can include the press release and invite them to cover the exhibition, and you are at their complete disposal for further assistance. For artist colleagues, friends, and family, a simple invitation email with the poster and flyer would be sufficient.
Step 8: Opening Day — The Exhibition
Congratulations. The exhibition concept and title are clear, you have found a professional-looking venue, the selection of works is carefully curated, and they are presented and installed in a manner that is in line with the best art galleries of the world. You have prepared your poster, flyer, press release, available works catalog, or checklist, and you promoted the exhibition strongly by mail and social media. Now it is time for the grand opening.
The opening event sets the tone for your exhibition. The goal is to create a welcoming and engaging atmosphere that leaves a lasting impression. Some drinks can give your exhibition a festive vibe, and you could even organize an opening speech by an art critic or collector. Engage with everyone who visits the exhibition. Say hello to every single person, even the ones you do not know yet, and let them know you are at their complete disposal to answer any further questions.
Document the opening and the rest of the exhibition. Take pictures when the exhibition space is filled with people and share them on your socials. Make sure to make the most of the exhibition by photographing your works in this ideal setting. Have some press exposure and possibly also some sales—but don’t be too pushy here. Maintain a high level of professionalism throughout the exhibition’s duration.
Once the exhibition closes, the work isn’t over. Follow up with attendees, send thank-you notes to supporters, and gather feedback. Assess the exhibition’s success in terms of visitor numbers, sales, and press coverage. Manage your expectations, however. If some days are very quiet, especially during the week or the days after the opening, that is perfectly normal. If you sell nothing at all, once more, don’t be too hard on yourself. Unfortunately, it happens, and it is part of the first steps of most artists.
Remember the experience you’ve gained, the pictures you can use to professionalize your profile, the new resume entry, and other things you have gained; think of contacts, leads for future sales, press exposure, et cetera. It’s all part of the process and the long-term strategy one must pursue to become a successful artist in the art world.
If you are ready for your next step, working with galleries, make sure to read our complete article How To Get Your Art In A Gallery next.
Last Updated on April 17, 2025


