In the art world, the way you present your work can be just as important as the art itself. But what if you don’t have access to expensive cameras, professional lighting, or costly editing software? Fortunately, with just your mobile phone, a free photo editing program, and a few strategic techniques that we are going to explain in this step-by-step tutorial, you can capture professional-level photos of your work that can hold their own in the art world.
High-quality photographs are essential for your art career, not just for building your portfolio but also for catching the eye of galleries, curators, and collectors. Appearances matter in the art world, whether we like it or not. If they cannot identify with the way you present your works, then they will not be able to connect with you or look at the work seriously, leaving your work unexhibited, unseen, and unsold. Therefore, in just five simple steps, we are going to show how you can photograph your art professionally to optimize your chances for success.
Step 1: What Do Professional Photographs Look Like?
As discussed in our article on how to create a professional art portfolio, there are three industry-approved ways to document and present your work:
1. Cropped image
2. Focused context image
3. (Focused) exhibition context image
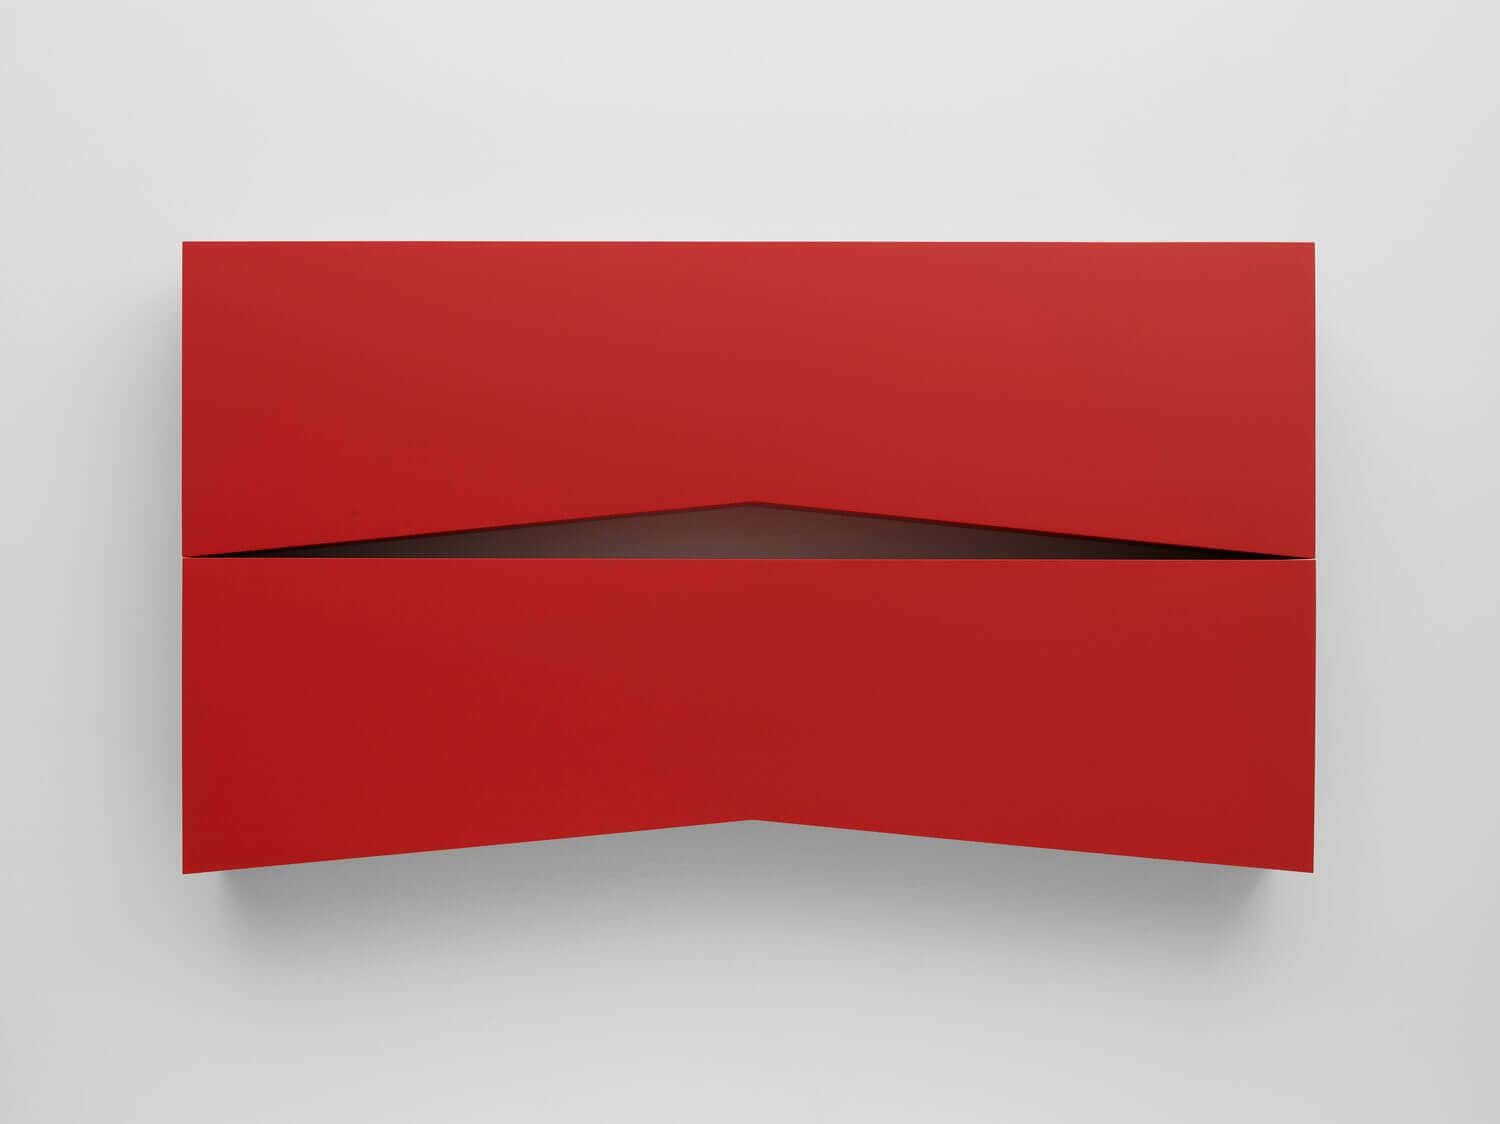
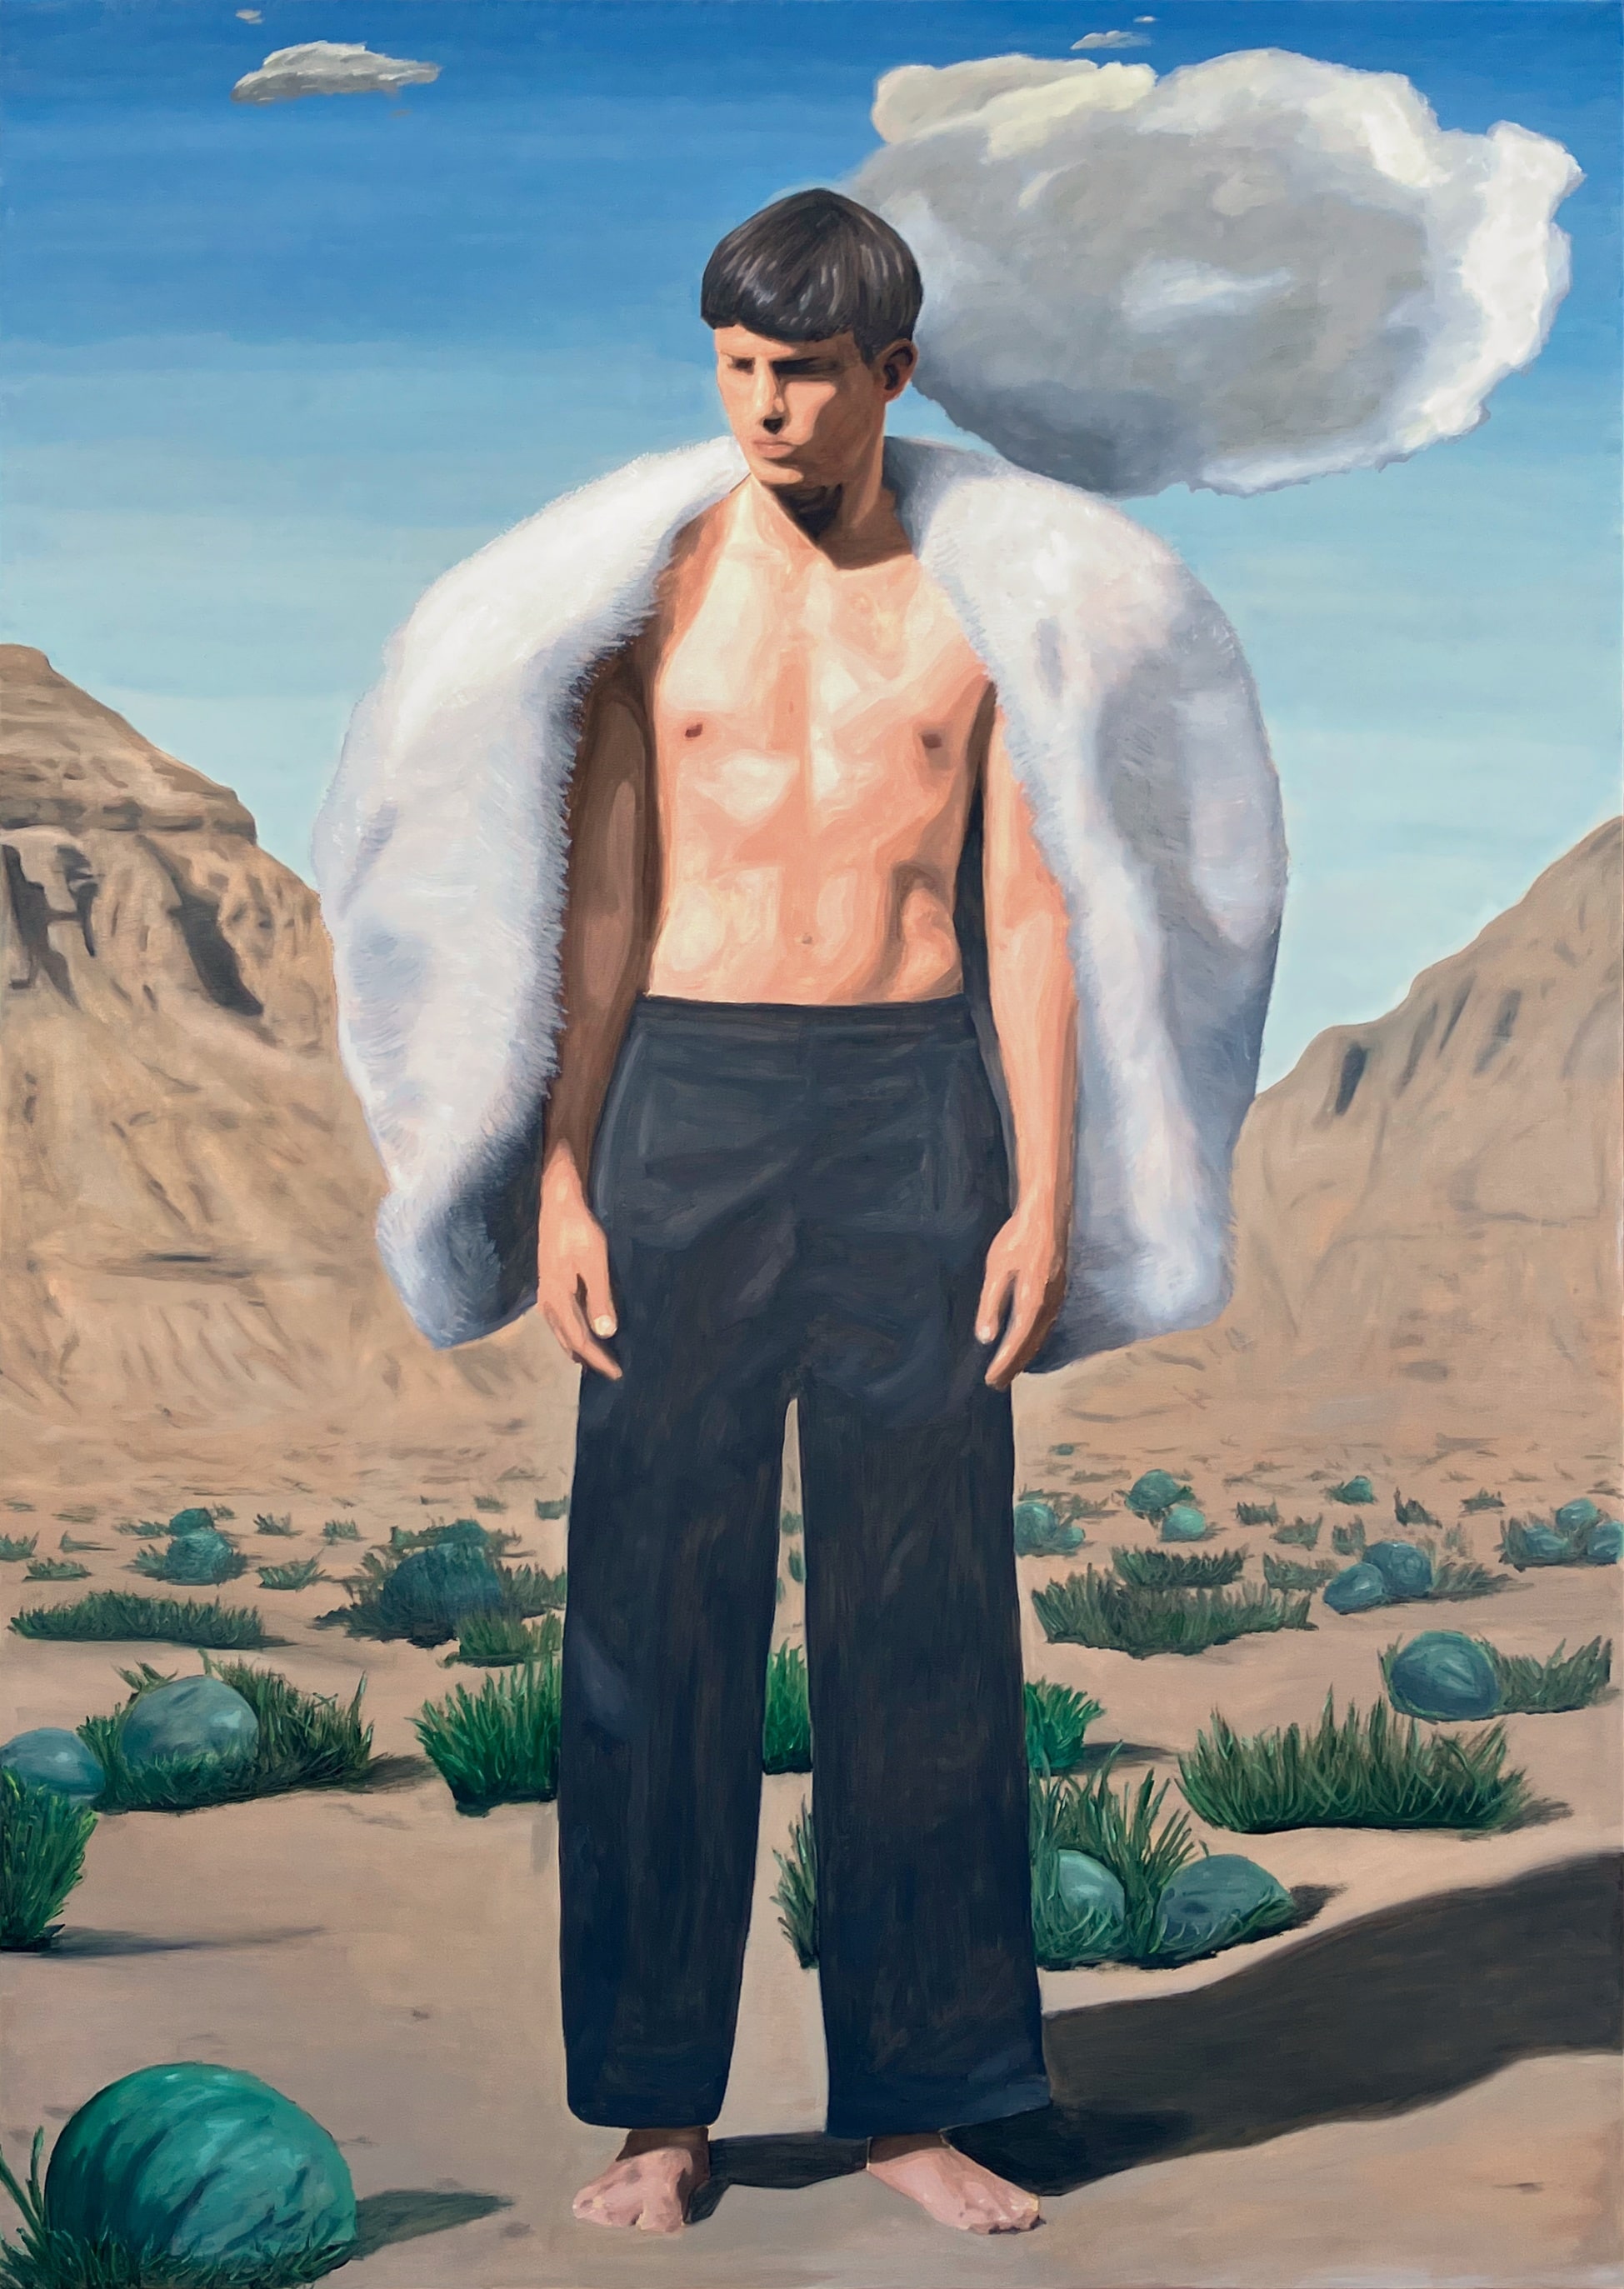
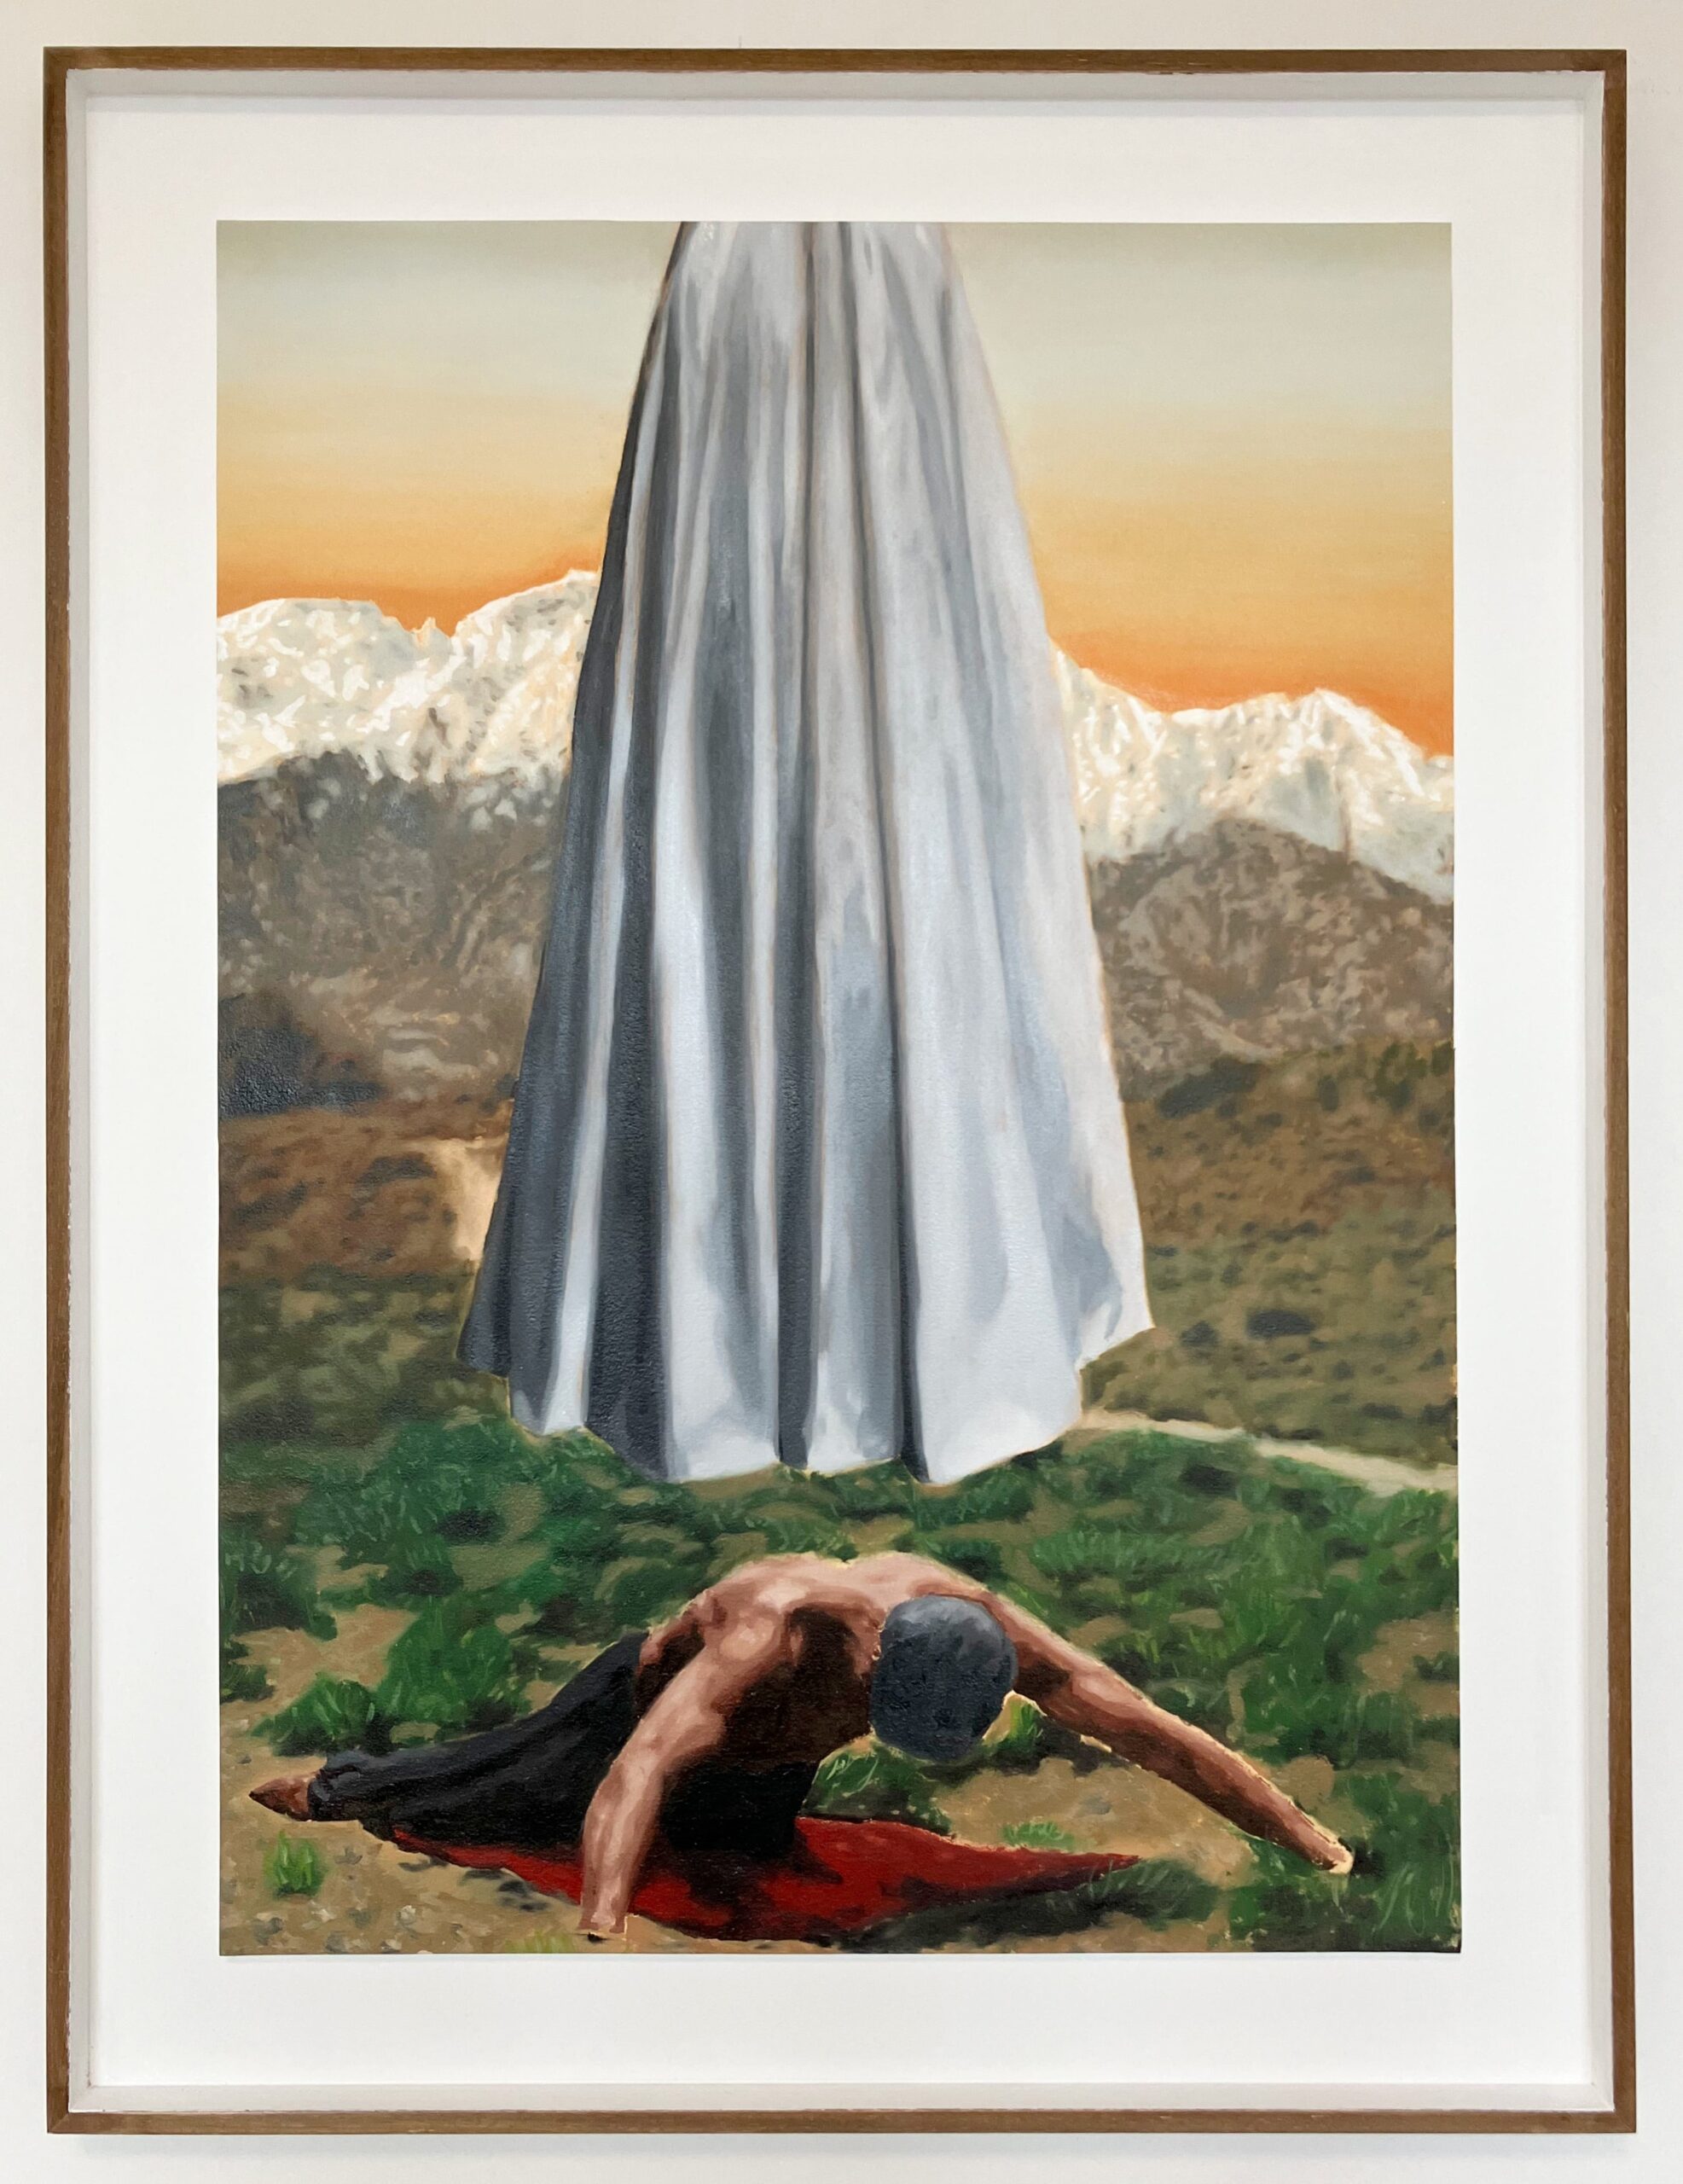
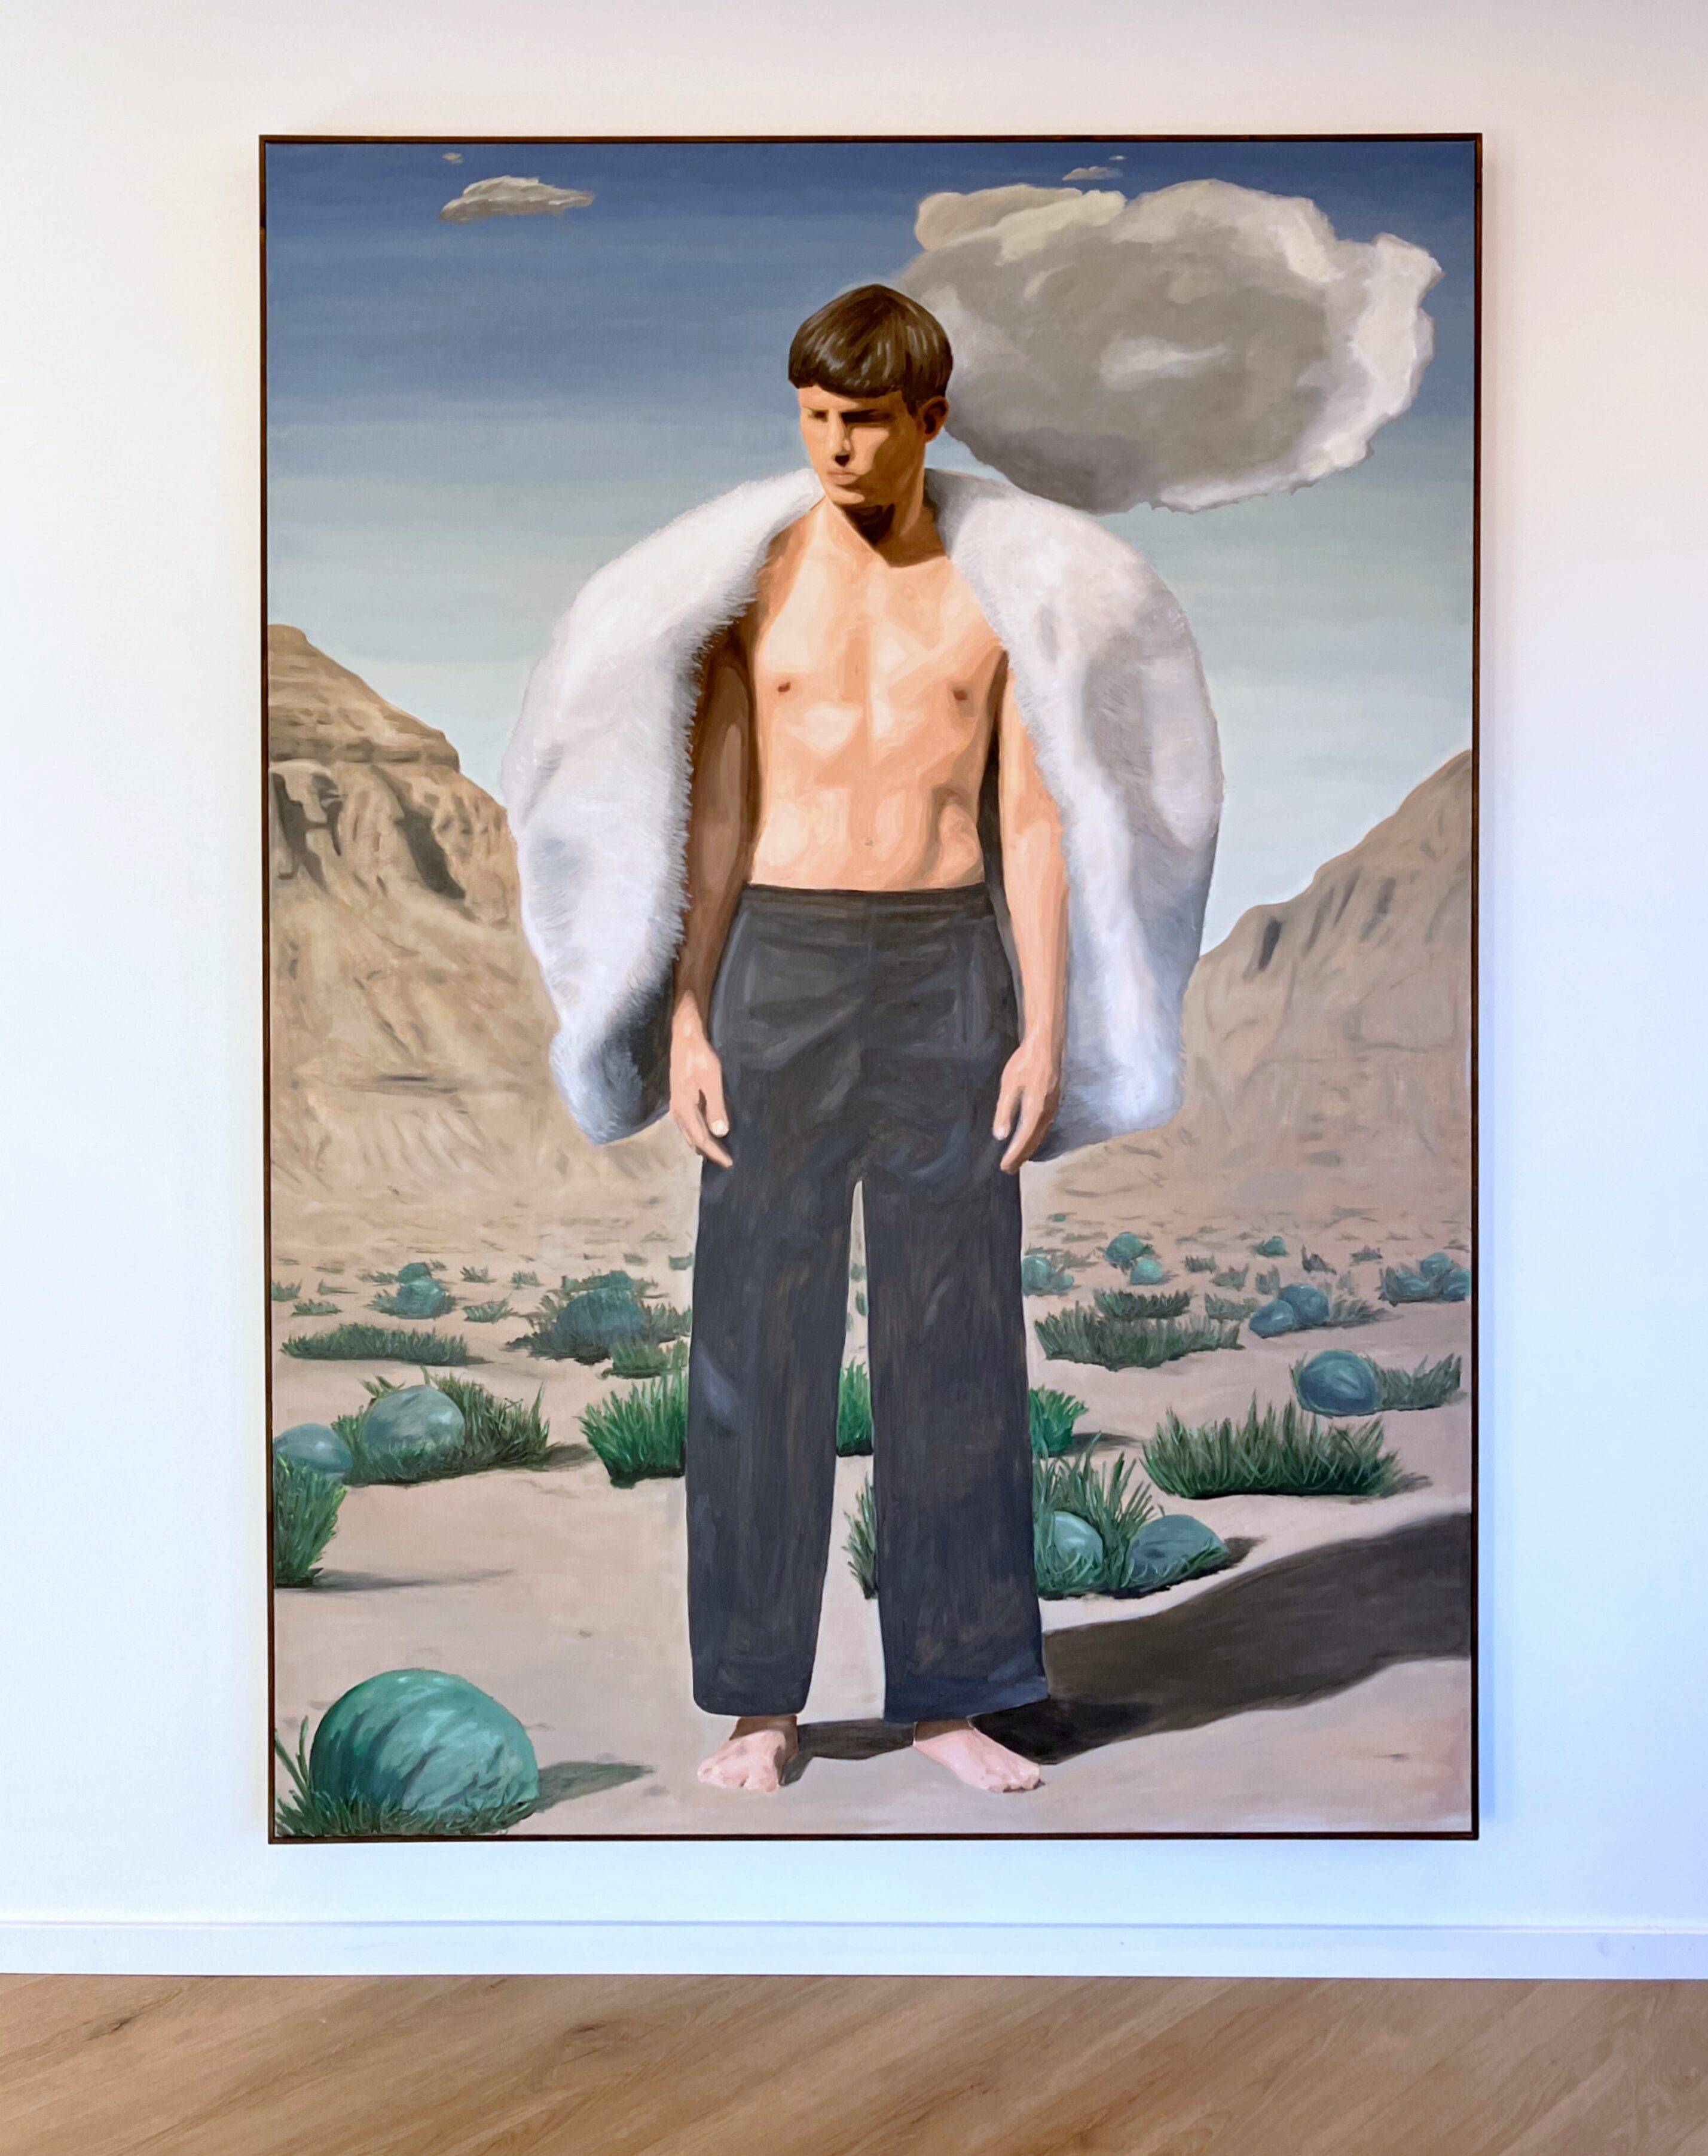
A cropped image means that the entire image is the artwork, with no space or context around it (see the example below by Clare Woods). A focused context image is a zoomed-in picture of the artwork in a natural setting. For instance, when the painting is hung on the wall, or a sculpture is placed on a pedestal (see the example below by Carmen Hererra). The exhibition context is an installation view of an exhibition, but this option is less suited when we are aiming to document the artworks to view them in the best way possible—especially when they are on an angle or include multiple other works. However, a focused exhibition context image can work really well with larger works, showing the artwork on the wall, with the gallery floor in the image as well (see the example below by Louise Giovanelli).
The images by professional art photographers all use these three approaches, so we should also be doing this. Bear in mind that the majority of galleries and established artists go for the second option, a focused presentation of the artwork zoomed in when it is on the wall or a pedestal. Furthermore, the photographs are all very sharp, bright, and accurate in color. Art photographers are true masters in what they do, but they are also expensive because of their advanced equipment—think of color cards and light setups. And rightfully so. If you are in the position to have your exhibitions and artworks photographed by professionals, do it. However, if you are an emerging artist, we can achieve 80% of the result with just 20% of the knowledge and equipment for no money at all—as we’ll illustrate in the upcoming steps.


Step 2: Finding the Right Lighting & Set Up
The lighting and setup depend, of course, on the selected image type. Let’s start with the cropped image.
(i) A cropped image can be photographed both inside or outside, as the surroundings will be entirely cropped out of the image. If you have high-quality artificial lighting or a lot of daylight coming in—preferably directly at the image or from both sides and not from one side only—you can perfectly photograph the artwork inside. If you do not have sufficient lighting inside, try taking your work outside on a bright, cloudy day. Never photograph your work in the sun or in full shadow when it is sunny. Ideally, you want to place the art where the sun shines through the clouds. If you are photographing the artwork outside and thus do not have a white wall around it, hang a white sheet of paper on the wall next to it. This will be an important lighting reference when adjusting the image in the post-edit in step four. If it is a painting, hang it on the wall or let it lean against it—although we do recommend hanging it on the wall so it will be easier to match the angle of the artwork in the next step. If it is a sculpture, place it on the floor against a clean background so a remove background app can identify the artwork to make an accurate crop.


(ii) To create a focused context image, the surroundings of the artwork do matter. In this case, if it is a painting, you want to find a clean white wall in your studio or home with sufficient and neutral artificial lightning, meaning the lighting should not be too focused on a central point, nor should it be too warm—preferably not below 4000 Kelvin. If that is not the case in your home or studio—which is very likely as most interior lighting is 3000 Kelvin—we can try to fix this in step four during the post-editing. If you have a decent amount of daylight, try to have it on both sides or directly in front of it so the light has the same distance and, thus, intensity on the entire surface. For sculpture, roll out a large sheet of paper against your wall—inside or outside in daylight as with the cropped image—to create a neutral environment, or place it on a white pedestal in front of a white wall.


(iii) Of course, to create a focused exhibition context image, one has to photograph their work during an exhibition. Ideally, we want the gallery space to have a white wall and a light grey or light wooden floor. The works are not allowed to be hung on cords but directly on the wall. The lighting is not something we can change, but if the lighting is, for instance, very centered on the wall, creating rings of light and lighting the artwork inequally, it can be advised to turn the lights off if there is sufficient natural light in the space. If not, just keep the lights on, and we’ll make things work during the post-editing in step four. Make sure the artwork is isolated and can be captured alone.


By turning the lights off and some post-editing, the lighting is equal and professional.
Step 3: Photographing the Artwork with Your Phone
Now, it is time to take out our phones and photograph the artwork in the selected setting. If your smartphone is not older than five years, it should have a decent camera. If you have an iPhone, you can navigate to via settings to your camera settings to ensure you are shooting in the best resolution possible, and you can also turn on the grid to have some additional vertical and horizontal lines to try photographing your work as straight as possible. Now it is time to go to your camera and start taking photographs.


Stand in the middle of your artwork. Hold your camera precisely in the middle of the height of the artwork. This means that if you have a painting of 60 centimeters or 24 inches high and 1 meter or 40 inches above the floor, you aim at 1 meter plus 30 centimeters high or 40 plus 12 inches high. If you have a tripod with a phone mount, you can set the tripod to this particular height. If you do not have a tripod, you can hold the phone yourself, or if you would be interested in purchasing one, we highly recommend this affordable and tall phone tripod on Amazon. Try to find the middle as precise as you can, but do not stress too much about it either, as we can fix any distortions or crookedness when editing the images in the next step. When it comes to focused exhibition context images, the same rules remain valid, but in this case, you take a few steps back so there is more wall in the picture, and also, the floor is being photographed.

Now that your camera is pointing at the very center of your artwork, you want to hold your phone steady and perpendicular to the angle of your artwork. This means that if your work is hanging on a wall, you should be holding your phone accordingly. If your artwork is leaning against a wall, try to match that angle with your phone. Be aware that this also means that the artwork’s center will be a bit higher—hence our recommendation to always try to place the artwork on the wall. Hold steady, and make sure the camera focuses on the artwork, which it should do naturally, as it is the only thing it can focus on in this setting. If not, give it a slight tap on your screen to refocus on where you have tapped.


Gently tap to take the photograph. Do this slowly to avoid blurring because of small movements by the phone and, thus, the camera. Make sure to take a couple of pictures to have at least one good image to work with. The most important thing is that the image is 100% sharp—as this is something that we cannot fix that easily afterward. For sculptures, you can take a couple of photographs from different angles if this is relevant to the piece in question. In this case, pivot the artwork instead of taking a picture from a different position to maintain the same background.
Step 4: Editing the Image in PhotoScape X
Now that we have our images and have airdropped or sent them to our computer, it is time to finetune them to make them look professional. As always, the devil is in the details. Although Photoshop is the most professional and advanced editing software, it is also very expensive. The free alternative we recommend for this specific purpose is PhotoScape X—which can be downloaded from the app store and is compatible with both Windows and Mac. Install PhotoScape and open the program. On the top left, select “editor.” In the left column, navigate to where you have stored the photographs we have just taken on your computer.
First, let’s improve the lighting so our colors are as accurate as possible. On the top right, we select the tab “edit” and click the plus symbol with “adjustments.” Select “white balance.” The white balance option enables us to improve the image by ensuring the images have the right light temperature and correcting the colors slightly. You can do this by clicking on the white wall around the artwork or the sheet of paper on the wall if we photograph the image outside, as discussed in step two. So, if the artwork was photographed in light that is either too yellow or warm or too blue or cold, we can resolve this using this feature—which improves the overall color accuracy.


Up next, we are going to crop the image so it is either cropped out entirely if you are going for a cropped image or to straighten it out if we are going for a focused context image. We stay in the edit tab on the top right and select “crop.” Select “perspective crop.” Now, we can crop the image out so it is perfectly straight, using the edges of the image if we are going for a completely cropped image or just outside the image for a focused context image. For the focused exhibition context image, it is a bit trickier as the edges of the artwork are further away, so feel free to do this in multiple tries and select the “grid” option on the bottom left to see if you have got it right—if not, continue cropping. To crop out a sculpture, you will need to have the pro version, or you can use an online background remover—however, I would advise you to go for a focused context image.


To conclude, navigate to the “color” tab on the top right to make further adjustments to achieve the same brightness and clarity of color as professional photographers. In 9 out of 10 cases, increasing the overall brightness will improve the image, but make sure not to overdo it so your tones and values remain true. With cropped images and focused context images, you could elevate the vibrance or saturation slightly to give it more punch, but do not go further than 20, or your colors will start to change instead of being enhanced. With focused exhibition context images, you can also play with darkening or lightening your shadows and highlights to reduce, for instance, artificial light circles on the wall or to reduce glare on the artwork. Make sure to click “compare” to see the original photograph and to have a reference that you are not overdoing your color corrections. If the corrections are good, select “apply.”


Step 5: Save, Convert, Compress & Share
With these small edits, your photograph should be completely ready for the real deal, optimizing your chances for success and elevating your overall appearance as an artist. Click save, and make sure to title your artwork professionally. I would advise you to mention all the metadata in the file name so you or a business partner can easily find it or copy and paste it into a catalog, checklist, or contract—this includes the title, year, medium, surface, and dimensions. Save the image as a PNG file.
Depending on the use of the image, you can convert or compress your images. For instance, to reduce the loading time of your images on your website, you can save them as WEBP files or compress them to reduce the file size. Now, it is time to use your pictures. Share them on Instagram, use them for your portfolio, insert them in your catalog with available works, or showcase them on your artist’s website.
Becoming a successful artist is all about being seen in the right manner and by the right people, and these pictures will do exactly that. If you are looking for more useful articles, tutorials, and industry-approved career advice for artists, make sure to have a look at our overview page Advice for Artists to increase your chances for success in the art world.
Last Updated on April 15, 2025


